A couple of friends of mine and I decided that we’re going to get together once a week or more and do some crafting. That discussion morphed into making Christmas gifts. That discussion morphed into Craft Fairs. So we’re now working on getting together a small crafting group business and attending craft fairs once a month or so. I think I’m going to start with resin jewelry, specifically earrings.
Before we get too terribly excited about this (TOO LATE), I’ll caution you that this is a limited trial run. We’re going to do one or two a month between now and the beginning of December, and see how it goes. But this means I need to up my game. Kind of the whole point of this blog was for me to try things – and the idea started with the fact that I seem to have an addiction to PURCHASING craft items, not necessarily USING the crafting items.
Today’s Crafting Decisions
So, today, I went into my craft room. First, I printed two new copies of a sublimation print I have been trying to make for almost a month now, and I can’t get it to take. I’ve done sublimation before, so I’m a little confused as to why it won’t work. But… I tried again, turned on the heat press, followed instructions, and again.. nada. Ugh. So, then I decided I would get my resin out and try that. My husband has tried it once.
Now here, I have to tell you… my husband is smart. Like scary smart. But, unlike his wife, he also has common sense. So when he tried resin jewelry (he also made a couple of chess pieces) for the first time, he made a small amount, single color and no extras.
So what do I do?
I decide I’m going to do 3 different colors, multiple molds – and throw in some glitter while I’m at it!!! For the record, I’m kind of scary smart myself, according to the people who do IQ tests and the teachers that told me how much potential I had :). I have a decent amount of common sense. But I also have this habit of jumping in head first and trying all the things at once, and then sometimes getting frustrated when it didn’t turn out the way I wanted (the FIRST time). I’m much better at teaching and giving advice than I am at heeding my own.
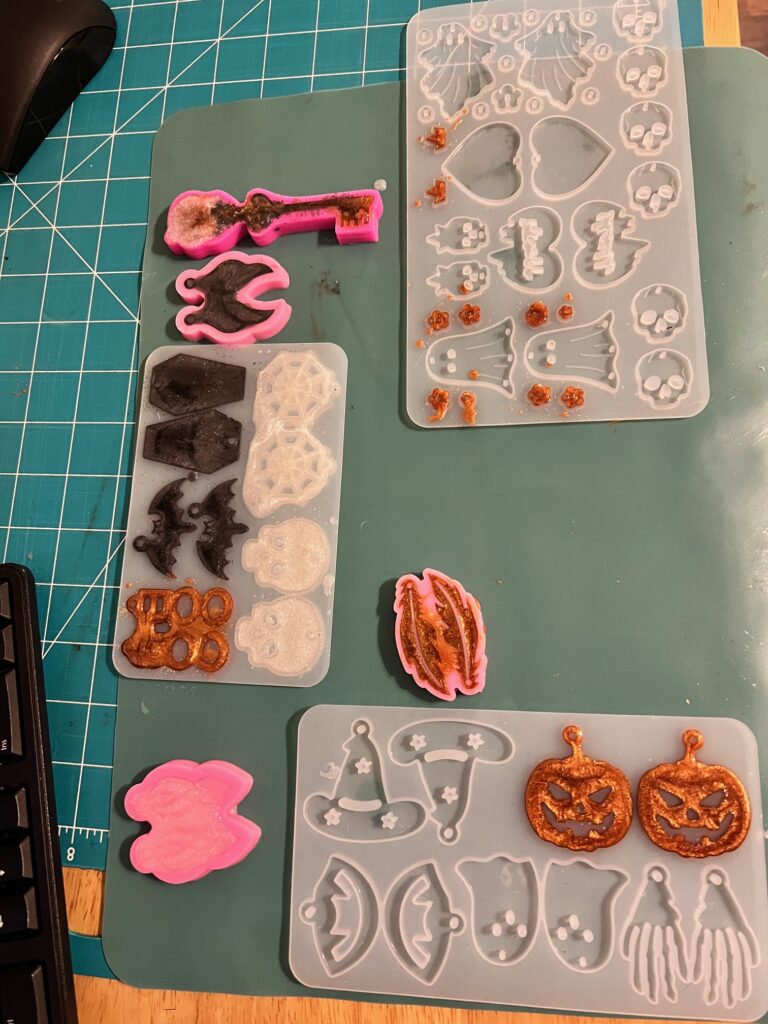
Of course, I forgot to film Kim Trying the resin for the first time, and only captured this quick photo after I was done. So I’ll have to do a Part 2, Kim Tried… again. But for the moment, just take a moment and gaze lovingly with me at the mess that I made. I’m now antsy… is it done yet? (I do not yet own a curing mat or UV lamp to speed the curing process up, so the answer is no, and it won’t be for about 24 hours).

I’ll come back tomorrow and update this post with the finished product, and I’ll film the releasing of the several pairs of earrings that will probably belong to my personal collection, as I’m certain I’ll have a list of things to do different before I put it in a craft show.
OK, so how do you make resin jewelry?
- The resin comes in two bottles – the product and the activator/hardener. These, we purchased locally at The Home Depot. Pour equal amounts of each into separate measuring cups. Then combine the two into a single cup. Stir for approximately two minutes, scraping down the sides frequently to ensure they are well combined. Allow to rest for a few minutes so that bubbles will begin to dissipate. You are on a timer. I believe you have about 40 minutes before the mixture hardens to the point where it can’t be used to make the resin jewelry.
- Because I was working on three colors, I took some disposable cups (linked below) and divided the clear mixture between the cups.
- Into the first cup, I took a small scoop of pearl white mica powder and mixed well, incorporating the color throughout the resin mixture.
- The second cup, I mixed a very small amount of black, grey and purple to get the sheen I wanted on the black.
- For the third cup, I mixed a small scoop of burnt orange.
- A couple of years ago, I had purchased both the mica powder and a variety of glitter to do tumblers, and then never did them. I do also have a motor. Maybe one day I will attempt them.
- Next, I took specific colors and lightly dusted the silicone molds. For the coffins, I used black iridescent. For the spider web and skulls, I used a mixture of white and glow-in-the-dark. For the pumpkin, I used the burnt orange glitter as well.
- Working quickly now (hence the slight mess), I began to fill the molds with the appropriate colors, ensuring that the liquid got into all of the nooks and crannies of the mold. Towards the end, I was coming up on 30 minutes, and finishing up with the orange. I did notice that the mixture was pouring slower and thicker.
- Once the molds were filled, I took a popsicle stick and tried again to ensure that all surfaces were covered. Then I shook the molds, hoping to dislodge any bubbles from the sides and bottoms.
- I then took a torch lighter that I purchased for this purpose, and ran the lighter quickly across the tops of each of the individual jewelry molds.
- Last, I took the photo and took one of my many (many) Amazon boxes and turned it upside down over the group of molds. We have a mama kitty and two babies in my craft room, so I’m trying to avoid pawprints in my finished product. 🙂
The items used in making resin jewelry
Just a reminder that these are affiliate links to Amazon. You will never pay more for clicking an affiliate link, but it does allow me to earn a small commission on sales, which helps me with the cost of this website, and/or with continuing to be able to review these crafts. 🙂
- Halloween Earring Molds (20 pairs of earrings)
- Glossy Skull Skeleton Key
- Although the bundle of earring molds comes with the items to put together the earrings, I knew I would be doing more, so I purchased this 600 piece kit of earrings, backs, and jump rings.
- As I still had some extra mixture, I pulled out my dreamcatcher molds to make some earrings out of it.
- This is the Mica Powder I used to color the resin mixture.
- The epoxy is Varathane Super Glaze Crystal Clear. We will try another next time, but since it was the first time we were using it, we wanted to go with a brand that we’d heard of before.
- Disposable cups (small). Medicine cups work great, but for your first time, you may want a kit like this. The silicone measuring cups will be perfect to mix your epoxy in, and the disposable ones are perfect for the colors. I love these small cups with the spouts, but I haven’t been able to find them for sale by themselves. (If you do, PLEASE comment below with the link!!)
Now it’s just a waiting game to see how they turned out. So check tomorrow’s post to see how it turned out!
As always, thank you for joining me for another episode of Kim Tried! What did you think? Do you do resin crafts, or do you want to try? Do you have a different favorite craft that you think I need to try? Or a life hack that has changed the way you do something? Please share!! Sharing is caring, after all! 🙂 See you next time!
